Video screencasts
You can look on example youtube videos to get an idea of what it's like to work with LyX, here is (longer) introduction to LyX.
Graphical tour
There is also graphical tour with screenshots that gives a step-by-step guide to creating a LyX document.
Screenshots
Here you see the main window of LyX. It looks like any other modern application with menus, toolbars, work area and status line. In this work area, you can see how basic mathematical formulas appear when you work on your document.
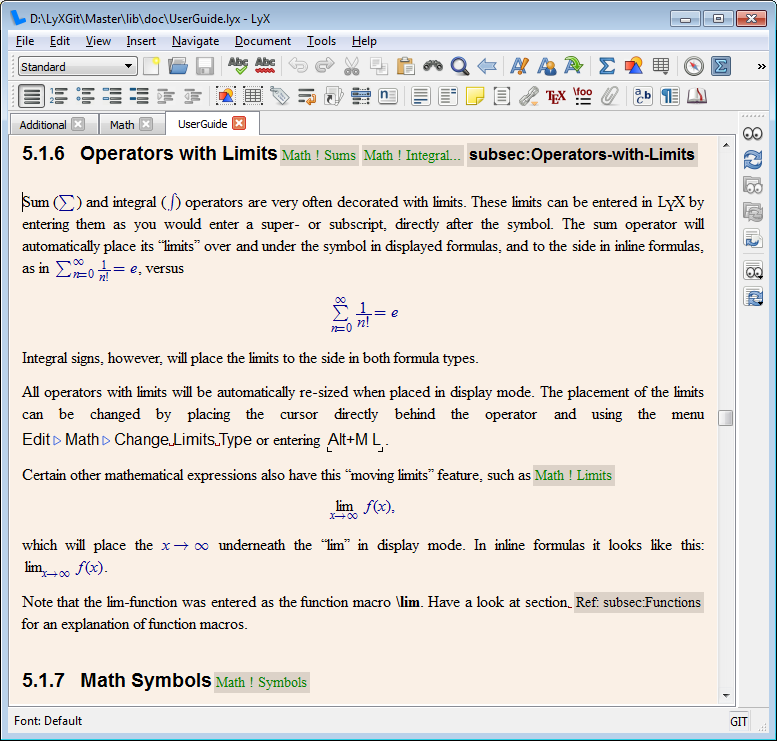
It does look a bit rough, but don't worry, because the output will be fine:
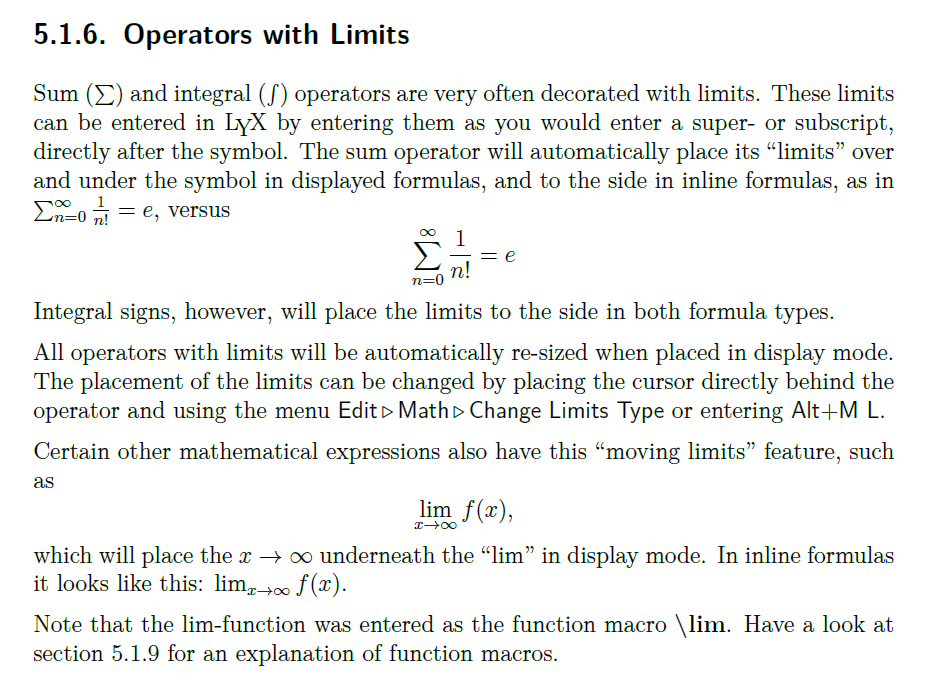
That picture is taken from a PDF reader which is used to preview your documents. With this program, you can get a pixel-exact image of the final print. As you can see on the first picture, LyX is not completely WYSIWYG, but rather WYSIWYM: What you see is what you mean.
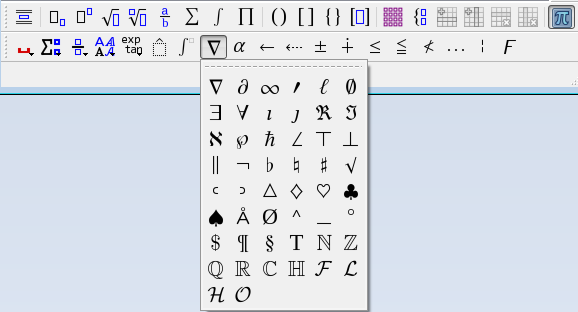
The math toolbars below can be used to make the complicated mathematical formulas. You can also enter LaTeX commands directly from the keyboard, which is faster when you've learned the codes. LyX automagically translates the codes to graphical display, providing visual feedback on-the-fly!
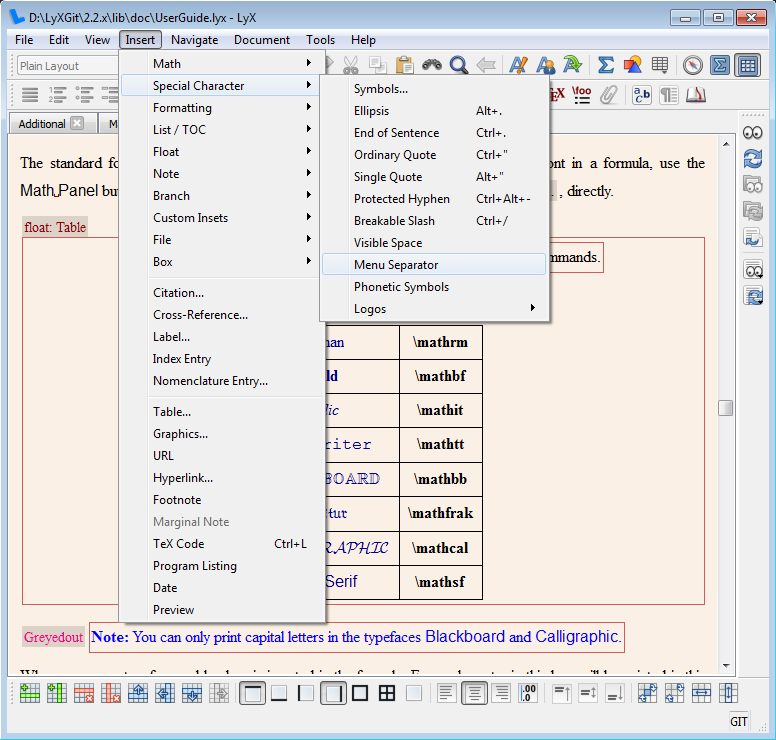
Next is a view of Special Character submenu in the Insert menu. In the background, you can see a table. LyX has advanced support for tables, which should satisfy all needs for normal usage. Even if LyX does not natively support some arcane feature you've found in the depth of your LaTeX bible, LyX can handle it, since you can insert arbitrary raw LaTeX commands almost anywhere in your text.
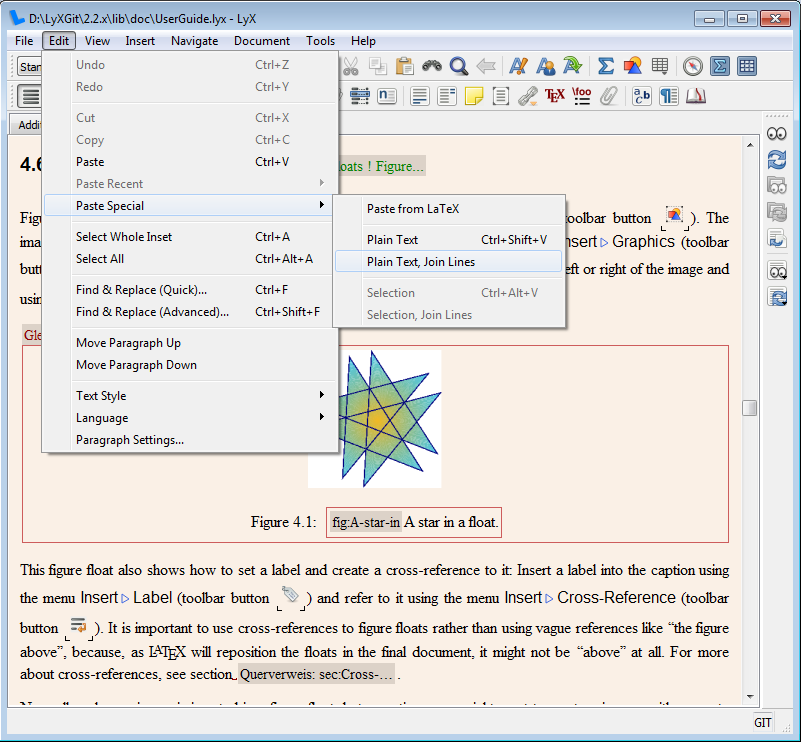
In this picture, we see the Edit menu open. In the background, we see a picture. You can include graphics (several file formats are supported) anywhere in your text, rotate and scale them as you wish, with on screen WYSIWYG display.
Many things can be seen in the following picture, where fullscreen mode is in action:

You see the math toolbars, which pop-up whenever you enter math mode. Once you turn on Instant preview feature, immediately after the cursor leaves math mode, math equations get rendered via LaTeX. An example of such a rendered result can be seen on left side.
On the right side you can see the LaTeX output, which will be exported from the current document. On the right side is the Outline pop-up. This is automatically created from the headings in your document. It is also hyperlinked to the document, so you can quickly navigate through even large documents. By the way, did you know that LyX handles large documents without any fuss?
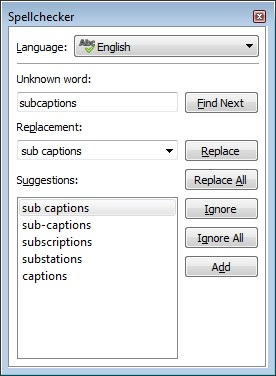
Below is the spellchecker window. LyX uses hunspell or enchant as the spellchecker.
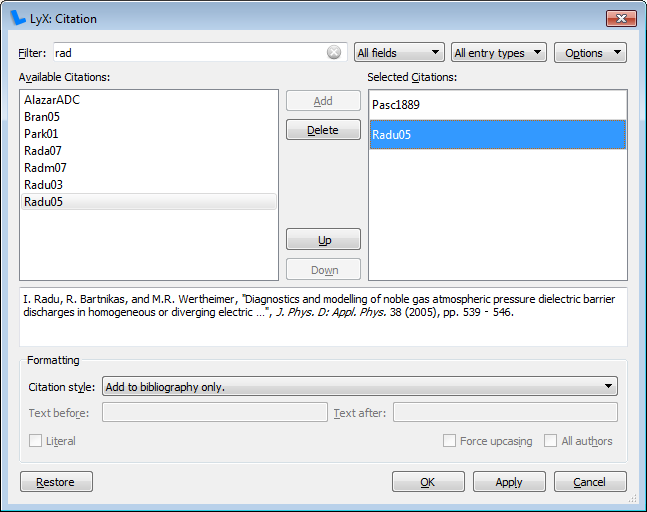
And here is the citation dialog. LyX supports BibTeX, LaTeX's very powerful literature system. Lyx also supports the more recent biblatex processor.
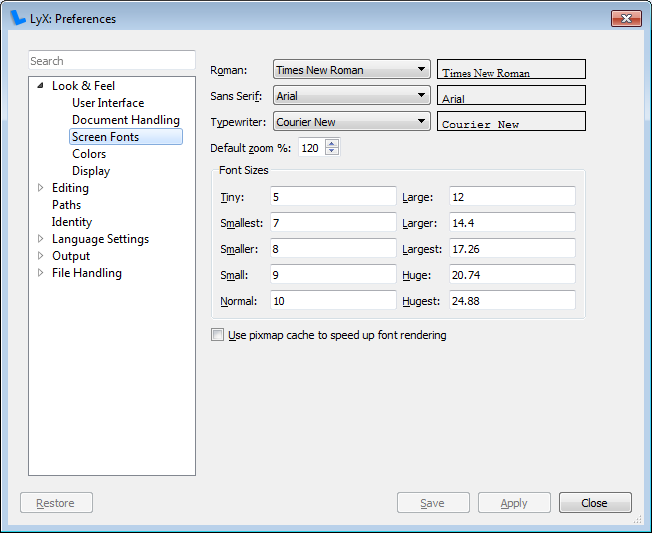
LyX can be configured comfortably via the preferences dialog. LyX is free, go check it out now!
Last but not least, LyX supports Windows, Mac OS X and Linux/Unix. A Mac OS X screenshot is shown below.
